How to Install a New Fuel Tank

Charles
Sat, 09/24/2011 - 13:29
The fuel tank is important although it is dangerous especially if the fuel tank is located where it can be easily damaged or if it is poorly made or is already flawed. Nowadays, vehicles have their fuel tanks located in a place where they are not vulnerable to damage that can be possibly caused by accidents or contacts with other parts. Many new vehicles these days are also equipped high quality fuel tanks making them leak or damage free but if there is a leak inside the fuel tank or has been damaged or punctured, then it needs to be replaced. An average mechanic can do this task. One has to be patient and safety has to be ensured every time. It must be kept in mind that gas is highly flammable and is very dangerous if disregarded. Safety tips: Following are some safety tips that will be very helpful;
  • It is recommended to work in a clean and organized area. Accidents can be caused by mess.
  • If the workplace is indoor, it must be made sure that there are no plot lights or other flammable objects.
  • The work area must be well ventilated.
  • A fire extinguisher should also be present at the site.
Things Needed: Following things are needed;
  • New fuel tank
  • Fuel line
  • Proper gas storage container
  • Hose pipes
  • Wrenches, normal hand tools, sockets
  • Fire extinguisher
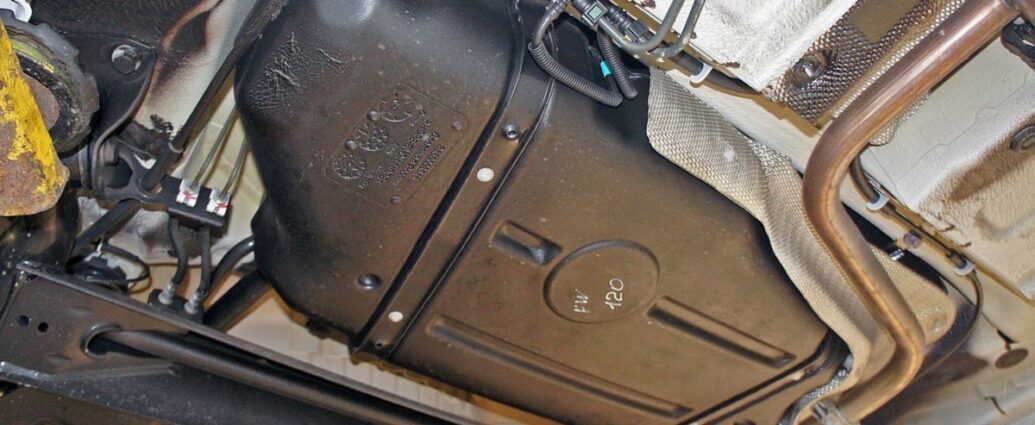
Now when all the things are in place, it’s time to start the task. One must not forget the safety tips. Draining the gas tank Before installing the new fuel tank, the gas has to be drained out of the old tank. A proper container must be used to catch the draining fuel. There is a drain cock in some fuel tanks that allows the gas to drain out neatly. If there is a drain cock, it will be located at the lowest point on the tank. The valve has to be loosened and the gas will completely drain out. If there is no drain cock present in the tank, then it would have to be drained by removing one of the fuel lines. The rubber pipe that exits the tank form its lowest point will completely drain the tank. It will be connected either to a fuel filter, fuel pump or a hard fuel line leading to the front of the car. The clamp on the end of the line connecting the gas tank has to be loosened. The hose has to be pulled off allowing the gas to run out of the tank into the container until it is completely drained. The gas can be poured into the gas can stored safely. It can be poured into the new tank. Removing the fuel lines The next step for replacing the fuel tank is by removing the fuel lines that connect with the tank. There are more than one lines in a gas tank. A fuel supply line is also present that leaves the tank at the lowest point and leading towards the engine or fuel pump. A large fill tube is also present coming out from the gas fill entry point. A vent line is also there that allows the pressure to be released when the level of the tank changes. All the lines going to the fuel tank have to be disconnected. It will be better to use a digital camera can be used to take a picture of the whole assembly setup before taking it apart. The picture will be helpful later when putting the things back together and avoid confusion. Dropping the rear suspension – 1 This step may be not necessary for every vehicle. This step can be skipped if not needed. There is a single beam at the rear in some cars. It will be only a suspension beam on front wheel drive vehicles but on rear wheel drive cars; there will be an axle with a rear differential. A particular situation can be inspected to see if the tank can be removed with rear suspension. If it cannot be done, the rear suspension has to be dropped. The bottom fitting on the rear shock absorbers has be disconnected first, then the rear suspension has to be pulled down and away from the hanging shocks. The rear suspension beam or drive assembly can be supported next at the center with a floor jack. This will help in slowly lowering the heavy parts. Dropping the rear suspension - 2 If the rear suspension has been forced to drop for removing the fuel tank, the assembly has been already supported with the floor jack. The rear brakes have to be disconnected next to avoid damaging them. The large nuts can be now removed that attach the drive assembly or rear beam to the car’s frame. When the nuts are off, the assembly can be lowered to the ground with the help of a jack. Removing the straps and dropping the fuel tank The fuel tank is held with the help of two metal straps which hold the tank safely and tightly. For removing the metal straps, the nuts at one end of the straps have to be loosened. They will normally drop on their own but they may be a little sticky. They have to be pulled down and unhooked from the other end. When there is nothing that holds it back, the old fuel tank can be dropped now. Installing the new one is just like taking out the old one only the other way round. In the terms of mechanics, installation is the opposite of removal.

Photo of the day

Choose Make

Select make
Select model
Select year