For many drivers, the idea of doing car maintenance—especially something like changing the oil—can sound intimidating. But in reality, it’s one of the simplest and most rewarding ways to care for your vehicle. Performing an oil change yourself can save both time and money compared to visiting a quick-lube shop. In this seven-step guide, we’ll show you how to do it safely, efficiently, and correctly. You might even discover that working on your own car is oddly satisfying.
How to Change Your Oil: A Step-by-Step Guide
Step 1: Prep for the Oil Change
Before diving in, take time to prepare properly—especially if it’s your first time. A bit of planning will make the whole job go smoothly.
Determine your vehicle’s engine displacement
Some vehicles come with different engine options depending on the trim. If you’re unsure of yours, here’s how to find it:
- Check the owner’s manual.
- Look under the hood for the Vehicle Emission Control Information sticker—it usually lists the engine’s size in liters (e.g., 1.8L).
- Use a VIN decoder online to identify your engine type.
Determine the correct oil type
Engines can be picky about what flows through them, and using the wrong oil can affect performance. You’ll need the correct viscosity for your specific model.
To find it:
- Refer to the owner’s manual.
- Check the oil cap for a printed recommendation.
- Search online and confirm across several reputable sources.
- Call your dealership for verification.
Once you’ve found the right viscosity (e.g., 0W-20, 5W-30), choose your oil:
- Conventional: Budget-friendly but less refined.
- Synthetic blend: A mix of conventional and synthetic; moderate cost with better quality.
- Full synthetic: The most refined and stable under extreme conditions—often required by newer cars.
Determine the amount of oil needed
Engines require a precise amount of oil—too little causes friction and overheating; too much can damage internal components or even cause hydrolock.
To find the exact capacity:
- Check the owner’s manual.
- Call the dealership.
- Search verified online sources.
Once you know your specs, buy the correct oil and a matching filter from a parts store. Watch a tutorial video specific to your car’s make and model, gather your tools, and you’re ready to begin.
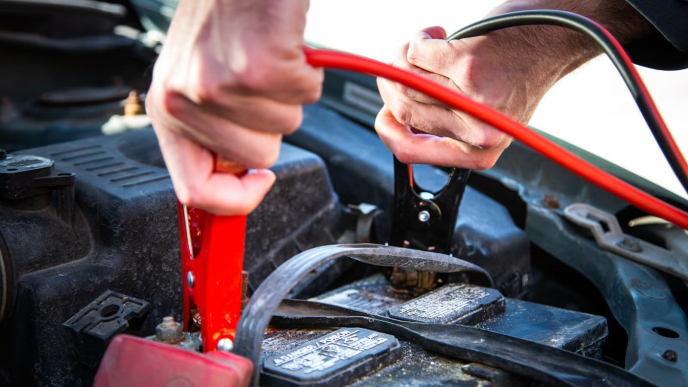
Step 2: Jack It Up, Open It Up
Raise the vehicle enough to access the underside comfortably. Use ramps, jack stands, or a lift—never rely solely on a floor jack. Safety always comes first.
Many newer vehicles have a plastic undertray that improves aerodynamics and shields the engine. You may need to remove this panel, which is typically fastened with clips or screws. Before continuing, inspect the area for leaks. If you spot any, have a mechanic check it before proceeding.
Step 3: Unplug It, Drain It
Position your drain pan or container beneath the oil pan. Remember, most cars hold about a gallon of oil or more. Using the correct wrench, loosen the drain plug (turn counterclockwise) and carefully remove it while keeping a firm grip—hot oil will pour out quickly. Let it drain for about five minutes, or until the flow slows to a thin stream.
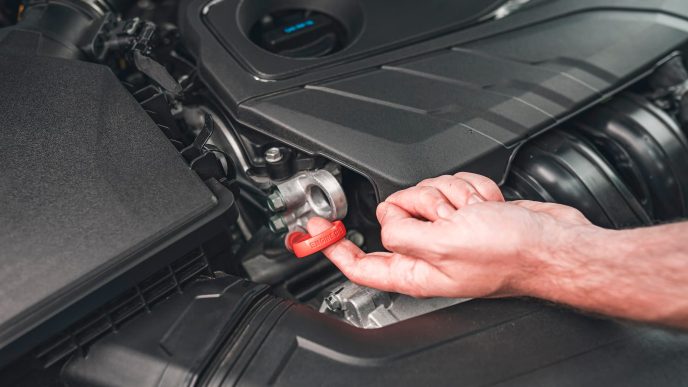
Step 4: Off with the Old Filter
Locate the oil filter—a small, cylindrical part attached to the engine. Using your hand or a filter wrench, loosen it slowly until oil starts to drip into your pan. Once the flow stops, remove the filter completely.
Check that the old rubber O-ring from the previous filter hasn’t stuck to the engine block. If it remains, remove it—failing to do so can cause leaks when the new filter is installed. Wipe away any excess oil before replacing parts.
Step 5: Drain Plug In, Filter On
Reinstall the drain plug snugly—but don’t overtighten. Too much force can strip threads or crack the oil pan. If your vehicle uses a washer behind the plug, replace it with a new one.
Before installing the new filter, dab a bit of clean oil on the rubber gasket. This helps form a tight seal. Screw the filter on by hand until snug, then give it another quarter turn.
Step 6: Fill It Back Up with Oil
Once the plug and filter are secure, reinstall the undertray and lower the car. Open the hood, remove the oil cap, and use a funnel to pour in the manufacturer’s recommended amount of oil.
Step 7: Check the Oil Level, Check for Leaks
Start the engine and let it run for 10 seconds to circulate the new oil. Then, turn it off and check the dipstick: wipe it clean, reinsert, pull it out again, and confirm that the level reaches the “full” mark. Let the car idle a few minutes longer, then inspect beneath it for any leaks near the drain plug or filter.
Congratulations—you’ve just completed your oil change and saved yourself a nice chunk of money. That sense of accomplishment? That’s the sound of self-reliance purring like a well-oiled engine.
FAQs
How often should I change my vehicle’s oil?
It depends on the oil type and manufacturer’s guidelines. Older cars typically need oil changes every 3,000–5,000 miles, while modern vehicles using synthetic oil can go up to 15,000 miles. Always follow the schedule in your owner’s manual.
What’s the difference between regular and synthetic oil?
Conventional oil is derived directly from natural petroleum and contains inherent impurities. Synthetic oil, on the other hand, is chemically engineered to remove those impurities, offering cleaner performance and longer life.
Is it easy to change my own oil?
For most cars, yes—it’s one of the more approachable maintenance tasks. Difficulty varies depending on your vehicle, so watch a tutorial specific to your make and model. Always keep backup transportation handy in case something doesn’t go as planned.
How do I know it’s time for an oil change?
Track your mileage and plan around your manufacturer’s interval. Don’t rely solely on oil color—it darkens quickly and doesn’t necessarily indicate degradation. For detailed analysis, you can even send a used sample to labs like Blackstone for a full report on oil condition and engine wear.
Why Trust Us
Hearst Autos brings together the expertise of Autoweek, Car and Driver, and Road & Track—three of the most respected names in automotive journalism. Our Gear Team tests every product we review, from GPS trackers to OBD2 scanners and EV chargers, ensuring genuine, hands-on evaluations.
We don’t chase clicks or push subpar products. Our goal is simple: to maintain the trust of readers who depend on us for reliable, expert advice built on decades of automotive experience.
From checking your first drain plug to understanding the oil that keeps your engine alive, these steps turn a messy job into an empowering skill—keeping you and your car running strong.